
MENU
|
MR2 Audio System
When I bought the car, it was practically in original condition. The original audio system was OK but showing its age. I had promised myself a CD changer so this was the time to upgrade!
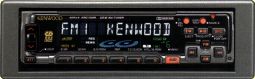
 I chose the Kenwood system for a number of reasons - firstly, because of the MASK
system which "blanks off" the head unit automatically by rotating through 180°. Sure
it's not as secure as a removable front panel but I can't resist the gadget factor.
Click on the picture for an animation of the MASK system in action.
I chose the Kenwood system for a number of reasons - firstly, because of the MASK
system which "blanks off" the head unit automatically by rotating through 180°. Sure
it's not as secure as a removable front panel but I can't resist the gadget factor.
Click on the picture for an animation of the MASK system in action.
Kenwood also supply a neat remote control unit which sits descretely behind a spoke on the
steering wheel. Some other manufacturers have remote controls but they're either credit
card style or otherwise obtrusive and conspicuous. Given the size of the cabin you might
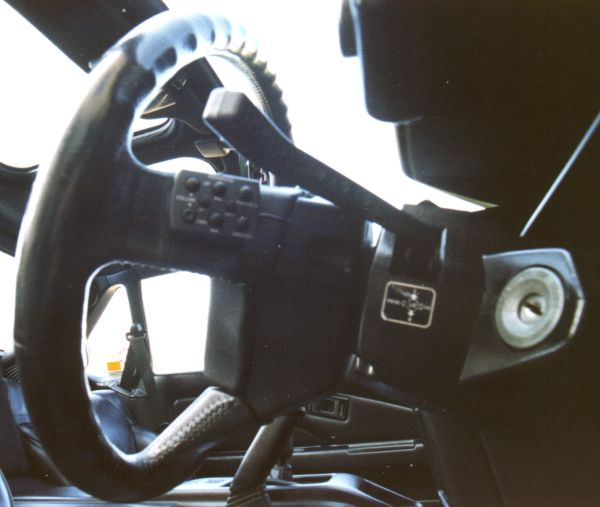 wonder at the usefulness of a remote control but the head unit sits right behind the
gear shift which can get in the way of the buttons. Also, on right hand drive cars, the handbrake is between you and the head unit which doesn't help. In use, the remote works really well with almost everything you need at your fingertips. The only problem is that it gets a bit too close to the indicator stalk. This means that when I want to flash the headlights, I hit the "next disc" button. Click on the picture of the remote for a photo of the unit in place.
wonder at the usefulness of a remote control but the head unit sits right behind the
gear shift which can get in the way of the buttons. Also, on right hand drive cars, the handbrake is between you and the head unit which doesn't help. In use, the remote works really well with almost everything you need at your fingertips. The only problem is that it gets a bit too close to the indicator stalk. This means that when I want to flash the headlights, I hit the "next disc" button. Click on the picture of the remote for a photo of the unit in place.
 Installing the head unit wasn't as difficult as I first thought. The main problem is that the original item is mounted by bolts onto a bracket rather than the more convential sleeve design. Whether it's by chance or design, the Kenwood head unit has the same sized holes in almost the same position, although only one pair of the holes would line up - no problem. The wiring was a piece of cake; I bought a DIN convertor from Halfords and plugged the two ends together - that's it! The little storage bin underneath was more of a problem. My compromised installation of the head unit meant that it was at an angle and now the storage bin wouldn't fit. I managed to sit it just behind the head unit but now it vibrates at certain engine speeds which is driving me mad...
The CD changer was to be the biggest challenge... literally! The problem is where to put
it? My first thought was under the passenger seat which would make changing discs easy.
However, I soon discovered that there's a ridge running under the seats which makes it
impossible to fit the unit underneath. Another possibility was to put it behind the
passenger seat but I didn't like the idea of mounting it at an angle and in any case,
that's where the roof panels are supposed to go. That left the boot - I was trying to
avoid that. Firstly there's a cable to run through the engine bay which makes things
 awkward and secondly there's precious little space in there anyway. After taking all the
panels out of the boot (so that's where the ECU is!) I found that there was only
one location where there wasn't inches of wadding and left room for other items and access
to the rear-quarter panels.
awkward and secondly there's precious little space in there anyway. After taking all the
panels out of the boot (so that's where the ECU is!) I found that there was only
one location where there wasn't inches of wadding and left room for other items and access
to the rear-quarter panels.
That location is on the raised section at the right-hand side, I was fortunate enough to be able to mount the changer parallel to the side of the car which means it doesn't take up much space. You can see how snug it fits - the brackets which mount the unit to the floor are actually tucked under the front and rear panels. There's just enough room to remove the side panel for access to the radio ariel. The cable runs behind the engine-bay panel to the opposite side of the boot. Now came the time to run the cable throught the engine bay.
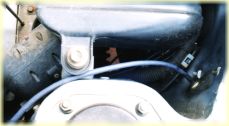 Now, drilling holes in my car isn't a very attractive prospect. There's also not much space to get at the best location and angle. I was sure that when I broke through the bulkhead, I would inadvertantly make a hole in something important... In the end, it
was quite easy. I drilled as small a hole as I could get away with which meant taking the plug on the end of the cable apart. After fitting a grommet and smearing the area with petroleum jelly I was quite pleased with myself. The hole at the other end of the engine bay was actually easier as I drilled through from inside the car, behind the passenger seat.
Now, drilling holes in my car isn't a very attractive prospect. There's also not much space to get at the best location and angle. I was sure that when I broke through the bulkhead, I would inadvertantly make a hole in something important... In the end, it
was quite easy. I drilled as small a hole as I could get away with which meant taking the plug on the end of the cable apart. After fitting a grommet and smearing the area with petroleum jelly I was quite pleased with myself. The hole at the other end of the engine bay was actually easier as I drilled through from inside the car, behind the passenger seat.
After all that I was quite happy with the whole system - a tremendous
improvement over the original equipment. However, with only a pair of
4" and a pair of 31/2"
speakers there was never going to be any amount of bass. After reading
an article on IMOC about fitting a speaker box between the seats,
I decided to have a go myself.
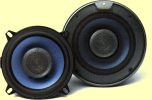 The next thing to do was replace the speakers. I chose pair of Kenwood 4" 2-way speakers for the dash with adjustable direction tweeters. I had to break off one pair of lugs to
get them into the hole but otherwise they went in without any problems. As for the rear speakers, after spending 30 minutes trying to get at them - I gave up and decided not to bother. At 31/2" I decided that they're
not really worth worrying about.
The next thing to do was replace the speakers. I chose pair of Kenwood 4" 2-way speakers for the dash with adjustable direction tweeters. I had to break off one pair of lugs to
get them into the hole but otherwise they went in without any problems. As for the rear speakers, after spending 30 minutes trying to get at them - I gave up and decided not to bother. At 31/2" I decided that they're
not really worth worrying about.
![]() Liam Crilly
Liam Crilly
© 25-Feb-1999