MENU
|
MR2 Speaker Box
In the quest for more bass I looked through the IMOC modifications section for ideas. There aren't really many options available for subwoofer locations. There's behind the seats which eats up a lot of room and leaves even less space for the roof panels. Or, there's the passenger footwell which isn't very big anyway and is an awkward space to do anything neatly.
However, there was one article that showed a pair of subwoofers in a box between the seats.
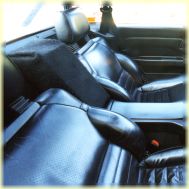
 After removing the cassetts storage box, there's a decent amount of room for something useful to go. There's also
brackets and holes
for mounting which means you don't have to make any holes in
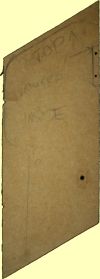
the car! I started off by picking up a sheet of 12mm MDF from a DIY store and making two spines - really just to see how easy it would be to get the angles right and to see what size speaker I could fit inside. To get the rough shape I put the cassette stroage box on it's side and drew around it onto the MDF. I added a few mm in both dimensions to make more room. After cutting out one of the sides I offered it up to the existing bracket. By placing the side on the outside of the bracket, there was a very slim gap between the seat and the side panel - perfect. I marked the bracket hole on the side panel and drilled a hole. After doing this to both panels, I had the basis of the box. I ran a strut between both sides to run across the two holes on the top bracket for keep things stable. This was still a prototype at this stage. Click on the image
for a large picture of the 3 panels.
I then went looking for speakers. I was hoping to be able to mount an 8" subwoofer at an
In my haste, I simply screwed the speakers straight onto the edge of the side panels (to
The whole job had taken about 2 hours and the sound quality
significantly increased. I left the unit in place for a couple of weeks
while I decided what changes I would make for version 2.
UPDATE
 angle within the enclosure but I soon found that this would be extremely difficult. Plan
B was for a pair of meaty 6" woofers. Kenwood actually make a pair of 160mm
(~61/4") component subwoofers which seemed perfect but were about £100 which I thought was a bit much, especially as I didn't know how this was going to turn out. Network In Car, Baldock suggested a pair of
unbranded 5" woofers which they claimed were quite "meaty". At £40 I snapped them
up.
 avoid cutting more MDF for a front panel), although I had to angle them inwards slightly.
I wired the new speakers to the front channel instead of the rear as I didn't want to risk distorting the existing rear speakers at high volume. On reflection, it may be better to disconnect the small rear speakers altogether and use the rear channel just for the speaker box. I then wrapped the unit up in black acoustic carpet (very similar the the
carpet behind the seats) and stapled it tight. The only piece of carpet that was tricky
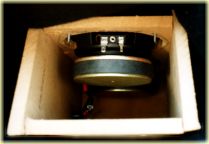
was the top. Firstly, you have to leave an opening to screw onto the top bracket and secondly you don't want staples showing at the top. To get around this I removed a couple of screws from the plastic strip underneath the rear window, tucked the excess carpet underneath and tightened. It's OK, but you can see the fold. Click on the picture for a larger view.
 One problem was that as I had mounted the speakers
to the edge of the front panels, the carpet ran directly over the
speakers which could sometimes vibrate. I decided to make version 2
with a complete enclosure and a recessed front panel to let the speaker
cones move without hitting the carpet. This works much better but now
I'm wanting for more bass - the 5" woofers are good, but they're not
subwoofers. Now I know that the system works, I'm tempted to go for the
Kenwood subwoofers on version 3. However, I'll have to re-think the
design of the enclosure as at present, the 5" speakers sit on a panel
between the two side panels. The larger Kenwood items wouldn't fit in
that gap so maybe I could use a modified version 1 design and mount them
onto the edge of the side panels. Watch this space...
Well, I found those Kenwood subwoofers with 25% off so I hooked them up and they
sound great. In order to make them fit I trimmed away the raised side
panels where the speakers needed to sit. This worked quite well and
means that I didn't have to do any more carpentry! I fitted some wider
screws at the same time to re-tighten the box but otherwise they just
dropped right in. The sound really is better, there's a proper thump
now (although not a heart-stopper) and the they compliment the front
speakers much better than the previous items.
![]() Liam Crilly
Liam Crilly
© 17-May-1999